Benefits of DIY Car Maintenance
Performing DIY car maintenance offers a range of advantages. Understanding these benefits can motivate more car owners to take charge of their vehicle’s upkeep.
Cost Savings
Maintaining a car at home reduces expenses significantly. Mechanics often charge hefty fees for labor and parts. Changing oil or air filters yourself costs only for materials, saving up to $100 per task.
Convenience
It’s more convenient to work on your car at home. There’s no need to schedule appointments or wait for days. Simple tasks like replacing spark plugs or windshield wipers can be done in under an hour.
Knowledge Enhancement
DIY maintenance enhances your vehicle understanding. Learning how to perform basic tasks helps identify potential issues early. Knowing how your car works makes future repairs less daunting.
Personal Satisfaction
Completing maintenance tasks offers a sense of achievement. Fixing your car provides personal satisfaction and pride. It’s rewarding to know you contributed to your vehicle’s longevity.
Increased Vehicle Lifespan
Regular DIY maintenance boosts vehicle lifespan. Consistent care helps avoid major breakdowns and keeps the car running smoothly. Tasks like tire rotation and brake checks prevent costly repairs down the line.
Immediate Feedback
Addressing issues immediately prevents them from worsening. Noticing brake pad wear or fluid levels early keeps the vehicle in good condition. Regular checks allow for timely interventions.
Environmental Impact
DIY car care reduces environmental waste. Using proper disposal methods for oil and filters is more eco-friendly. Carpooling to the mechanic shop generates unnecessary emissions.
These benefits underline why more car owners should consider DIY car maintenance. Simple tasks yield significant rewards by ensuring the car remains in excellent condition.
Essential Tools and Supplies

Several tools are essential for DIY car maintenance, ensuring efficiency and safety. A basic tool kit is needed, containing items like screwdrivers, pliers, and wrenches. Quality brands offer durability and reliability.
Jack and Jack Stands
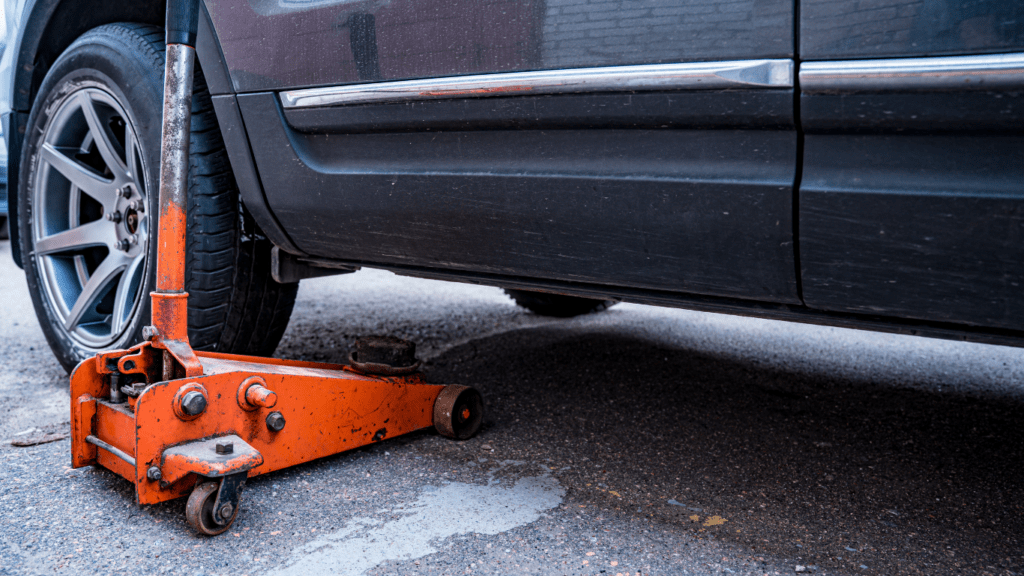
Lifting the car is necessary for many tasks. A reliable car jack and jack stands provide stability. Hydraulic floor jacks are preferable for ease of use.
Oil Filter Wrench
Changing the oil filter requires a specific wrench to remove and replace it. Adjustable oil filter wrenches can accommodate different filter sizes.
Torque Wrench
Properly tightening bolts ensures safety. A torque wrench provides accurate measurements, preventing over-tightening or under-tightening.
Funnel and Drain Pan
Oil changes and fluid top-offs need a funnel and drain pan. These tools prevent spills and facilitate clean fluid collection. Large-capacity drain pans are ideal.
Tire Pressure Gauge
Correct tire pressure improves fuel efficiency and safety. Digital tire pressure gauges offer precise readings.
Maintenance Fluids
Certain maintenance tasks necessitate specific fluids. Motor oil, brake fluid, power steering fluid, and coolant are common. Always use the manufacturer-recommended types and quantities.
Air Compressor and Tire Inflator
Maintaining proper tire pressure sometimes requires inflating tires. An air compressor and tire inflator ensure tires are always at optimal pressure.
Safety Gear
Safety gear is crucial when performing maintenance. Gloves, safety glasses, and mats protect against injuries and keep the workspace clean. Non-slip gloves offer a better grip, and safety glasses shield against debris.
Owner’s Manual
The owner’s manual provides essential information about the car. Refer to it for specifications, fluid types, and recommended maintenance schedules. It’s an invaluable resource for any DIY maintenance task.
A well-equipped home garage ensures efficient and safe car maintenance. Each tool and supply has a specific purpose, enhancing the DIY experience and promoting vehicle longevity.
Checking and Replacing Engine Oil
Monitoring and changing engine oil keeps your car running smoothly. It ensures efficient engine performance and extends the vehicle’s life.
How to Check Oil Levels
Start by parking your car on a flat surface and turning off the engine. Let it cool for about 10 minutes to allow all the oil to settle in the oil pan. Open the hood and locate the dipstick, which usually has a bright handle.
- Locate and Remove Dipstick: Pull the dipstick out and wipe it clean with a lint-free cloth.
- Reinsert and Remove Again: Insert the dipstick back fully then pull it out again.
- Read Oil Level: Check the oil level on the dipstick. It should be between the “Min” and “Max” marks.
- Inspect Oil Quality: Look at the oil color and consistency. Fresh oil is amber; dirty oil appears dark or gritty, indicating it’s time for a change.
Steps to Change Engine Oil
Gather all necessary tools and materials: a new oil filter, fresh oil, an oil filter wrench, a funnel, a drain pan, and a wrench.
- Warm Up Engine: Run the engine for 5 minutes to warm the oil so it flows better.
- Place Drain Pan and Remove Plug: Position the drain pan under the oil pan and unscrew the drain plug. Let the oil drain completely.
- Remove and Replace Oil Filter: Use the oil filter wrench to remove the old oil filter. Before installing the new filter, coat its rubber seal with fresh oil to ensure a good seal.
- Reinstall Drain Plug: Once all the oil has drained, replace and tighten the drain plug securely.
- Add Fresh Oil: Insert the funnel into the oil fill cap and pour the new oil slowly. Refer to the owner’s manual for the exact amount required.
- Check Oil Level: After adding oil, check the dipstick again to confirm the level is correct.
- Dispose of Used Oil: Place used oil in a sealed container and take it to a recycling center or an auto shop that offers oil disposal services.
Regular oil checks and changes keep your engine running optimally. This DIY task is simple yet vital for maintaining your vehicle’s health.
Replacing Air Filters
Air filters play a crucial role in a vehicle’s performance. Replacing them at home is simple and cost-effective.
Importance of Clean Air Filters
Clean air filters ensure optimal engine performance. They prevent dirt and debris from entering the engine. A clogged air filter can reduce fuel efficiency by up to 10% (source: EPA). Maintaining a clean air filter extends engine life and improves overall efficiency. Poor air quality from a dirty filter strains the engine, leading to potential issues.
- Locate the Air Filter: Consult the owner’s manual to find the air filter housing. It’s usually a black plastic box near the engine.
- Open the Housing: Unfasten the clips or screws holding the cover. A flathead screwdriver might be necessary.
- Remove the Old Filter: Take out the old air filter. Note its orientation for correct installation of the new filter.
- Inspect and Clean the Housing: Check the air filter housing for dirt. Wipe it clean with a damp cloth if needed.
- Install the New Filter: Place the new air filter in the housing in the same orientation as the old one.
- Secure the Housing: Reattach the cover with clips or screws. Ensure it’s firmly in place.
Replacing air filters regularly maintains engine health and boosts performance. Doing this simple task at home saves time and money while keeping your vehicle in top shape.
Inspecting and Changing Car Battery
Regularly inspecting and changing your car battery ensures your vehicle starts reliably and runs efficiently. I’ll break down how to test and replace your car battery.
How to Test a Car Battery
Testing a car battery requires a multimeter. Check for 12.6 volts or higher when the engine’s off, indicating a fully charged battery.
- Gather Tools: Multimeter.
- Prepare Vehicle: Turn off all electronics, then shut off the car.
- Connect Multimeter: Attach the red lead to the positive terminal and black lead to the negative terminal.
- Read Voltage: A reading of 12.6 volts or higher suggests a healthy battery. If lower, it might need charging or replacing.
Procedure to Change a Car Battery
Changing a car battery takes minimal effort and tools, ensuring your vehicle stays powered.
- Gather Tools and Supplies: Wrench set, terminal cleaner, new battery.
- Ensure Safety: Wear gloves and safety glasses. Turn off the engine.
- Detach Old Battery: Remove the negative terminal first, followed by the positive. Loosen the clamp, then remove the old battery.
- Clean Terminals: Use a terminal cleaner to remove corrosion.
- Install New Battery: Place the new battery, tighten the clamps, then reconnect the terminals—positive first, negative second.
- Check Connection: Ensure connections are tight, then start the car to verify the installation.
With these steps, you maintain your car’s battery efficiently, ensuring reliable performance.
Tire Maintenance
Proper tire maintenance ensures vehicle safety and extends tire life. Regular checks and minor repairs can help avoid costly issues and improve fuel efficiency.
Checking Tire Pressure
Checking tire pressure promotes tire longevity and optimal fuel efficiency. Use a tire pressure gauge to measure each tire’s pressure. Compare the readings with the recommended PSI in the owner’s manual or driver’s door jamb sticker. Inflate or deflate tires as needed to match the specified PSI. It’s best to perform this check monthly and before long trips for accuracy.
Rotating Tires Correctly
Rotating tires evenly distributes wear and prolongs tire life. Lift the car with a jack and secure it with jack stands. Follow the rotation pattern, front to rear and crisscross, specified in the owner’s manual since different vehicles have varying patterns. Typically, rotate tires every 5,000-7,000 miles for balanced wear.
Repairing a Flat Tire
Repairing a flat tire saves money and is relatively straightforward. First, use a car jack to lift the vehicle and remove the damaged tire. Locate the puncture and determine if it’s repairable; small punctures in the tread area often are. Use a tire plug kit to insert a plug into the hole, trim the excess, and re-inflate the tire. For sidewall or large damages, replace the tire instead of attempting repairs.
Properly maintained tires contribute significantly to overall vehicle performance and safety.
Replacing Windshield Wipers
Replacing windshield wipers is one of the easiest DIY car maintenance tasks you can do at home. To ensure clear visibility during all weather conditions, it’s vital to replace them every 6 to 12 months.
Tools and Supplies
You’ll need new windshield wiper blades that match your vehicle’s make and model. Refer to your owner’s manual to select the correct size. Also, have a clean cloth to wipe the windshield and wiper arms.
Removal of Old Wipers
Lift the wiper arm away from the windshield until it stays in an upright position. Press the small tab on the underside of the wiper where it meets the arm. Slide the wiper blade down, off the hook, to remove it. Take care not to let the wiper arm snap back onto the windshield to avoid damage.
Installing New Wipers
Attach the new wiper blade by sliding it onto the hook until it clicks into place. Gently lower the wiper arm back onto the windshield. Repeat these steps for the other wiper blade.
Final Check
After replacing both wipers, test them by turning on your car’s wiper system. Ensure they move smoothly and clear the windshield effectively. If there’s any streaking or noise, recheck the installation to make sure everything’s aligned properly.


